vCenter Orchestrator: Operation Automate - Part One
As promised, here is the first of a series of post regarding using VMware vCenter Orchestrator to add a new host to vCenter and later in another workflow, deploy a VM to that host. Let’s lay out the requirements first so we know where we are going:
- Minimal data input: This is the minimize the possibility of typos and errors. This will also allow us to utilize just about anyone to deploy these virtual machines.
- Automatic generation of hostnames: This goes hand-in-hand with the above requirement.
- Email notifications on completion and on exceptions: This will allow us to “walk away” from it and know the outcome.
Now that we have laid out some requirements we should start to think about the process. With vCenter Orchestrator being a tool were we can visually build the workflow we can now move on to starting to lay out the actual workflow. I like to go ahead and place all parts that I think I need initially and link them together later as I go through. What this does is allows me to build each step and also double-check that I have everything I need to move on to the next step.
Here we will lay out the first part of the process, adding a host to vCenter. Here are the steps to follow:
- Open the vCenter Orchestrator Client and select Workflows on the left-hand side.
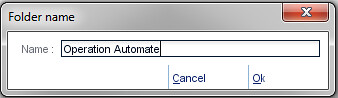
- Right-click and create a new folder. Let’s call it Operation Automate.
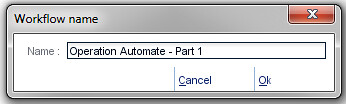
- Right-click on Operation Automate and select New workflow. Let’s name this workflow Operation Automate - Part 1
- Right-click on Operation Automate - Part 1 and select Edit.
At this point you are presented with the workflow editor. As a good practice, I always increment the version to 0.0.1 and in the comment section say, “Initial version”. Next we want to look at the Schema tab. In this section you will be able to build your workflow visually. There are many different approaches on how to build something in Orchestrator but I tend to lay out my workflow first, add parameters and inputs after. As I stated before, this makes it easier for me to make sure that I have what I need in place as I go instead of trying to think of everything first.
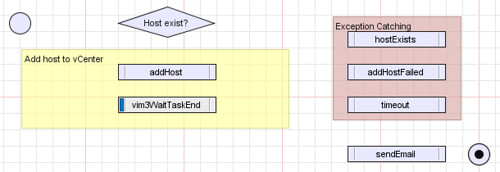
The first thing we need is a test to see if the host already exists in vCenter. We don’t want to try to add one that has already been added of course. To do this we need to select a Decision task from the Generic section on the left side. Just drag and drop the Decision task from the left side onto the grid. Let’s rename this to Host exist?.
The next thing we need is a scriptable task which we will call addHost. As you did in the previous step, just drag and drop the scriptable task from the Generic section onto the grid. We will then want to add a wait action to wait for the task to complete. To do this you will want to select Action & Workflow on the left side and drag/drop the Action element onto the grid just below the addHost task. Once you do this a popup window will open called the Chooser. Here is where we will select the wait action. This is a searchable field and so you can enter _waitTaskEnd_in the search box, like so:

Now we need to add an action to send email notifications. Drag and drop another scriptable task onto the grid. Let’s name this one sendEmail. Now lets add some exception catching for the tasks that we will be using. This will allow us to catch any exceptions/errors and send them through the sendEmail task. For this piece, you will want to drag three more scriptable tasks onto the grid. We will name these: hostExists, addHostFailed, and timeout. And lastly, we will select the Generic section on the left side again and drag and drop the _End workflow_piece onto the grid. Your workflow should look something like this by now:
Now that we have a skeleton with the tasks involved we can move on to actually making these actions usable. We will proceed to configure the workflow actions in the next parts of the series…